
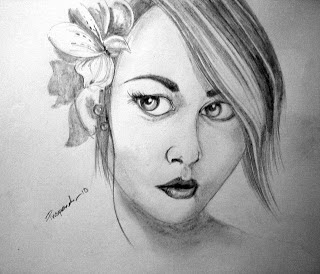
Who does not wants to have a good skill of arts. It gives you an amazing and impressive side of your character and personality. You can amaze your close and dear ones, even everyone. Like wise painting is a very beautiful form of ART. It needs both talent and skill. This blog of mine is for those all art lover people who wants to develop their skills of painting and sketching. An artist needs a good talent but beside this regular practice is very needed to develop more skills otherwise talent becomes useless. In this blog I have tried to explain about pencil sketch techniques which I know and of course I have shared some of my artworks with you.
PENCILS
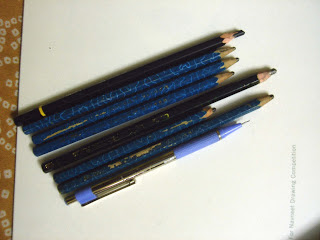
Many types of pencils are available in shops. Commonly available pencils are HB, 2B, 4B, 6B, 8B, 10B, 0.5, charcoal.
HB and 0.5 are for sharp strokes and soft shading. For thick strokes and dark shades we normally use 2B, 4B, 6B, 8B, 10B. Charcoal is a completely dark and rough strokes.
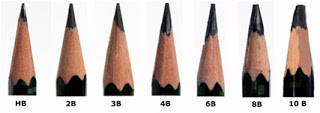
This picture shows different types of pencil lead and their difference.
Above picture clearly depicts the difference of strokes made by different pencils. This concept should be very clear when you are making a sketch by pencils.
HOLDING TECHNIQUES
Holding the pencil in proper manner is very important in pencil sketch drawing. It may be said that hold the pencil as you are most comfortable to hold it.


STROKES DEFINES MATERIAL SURFACE
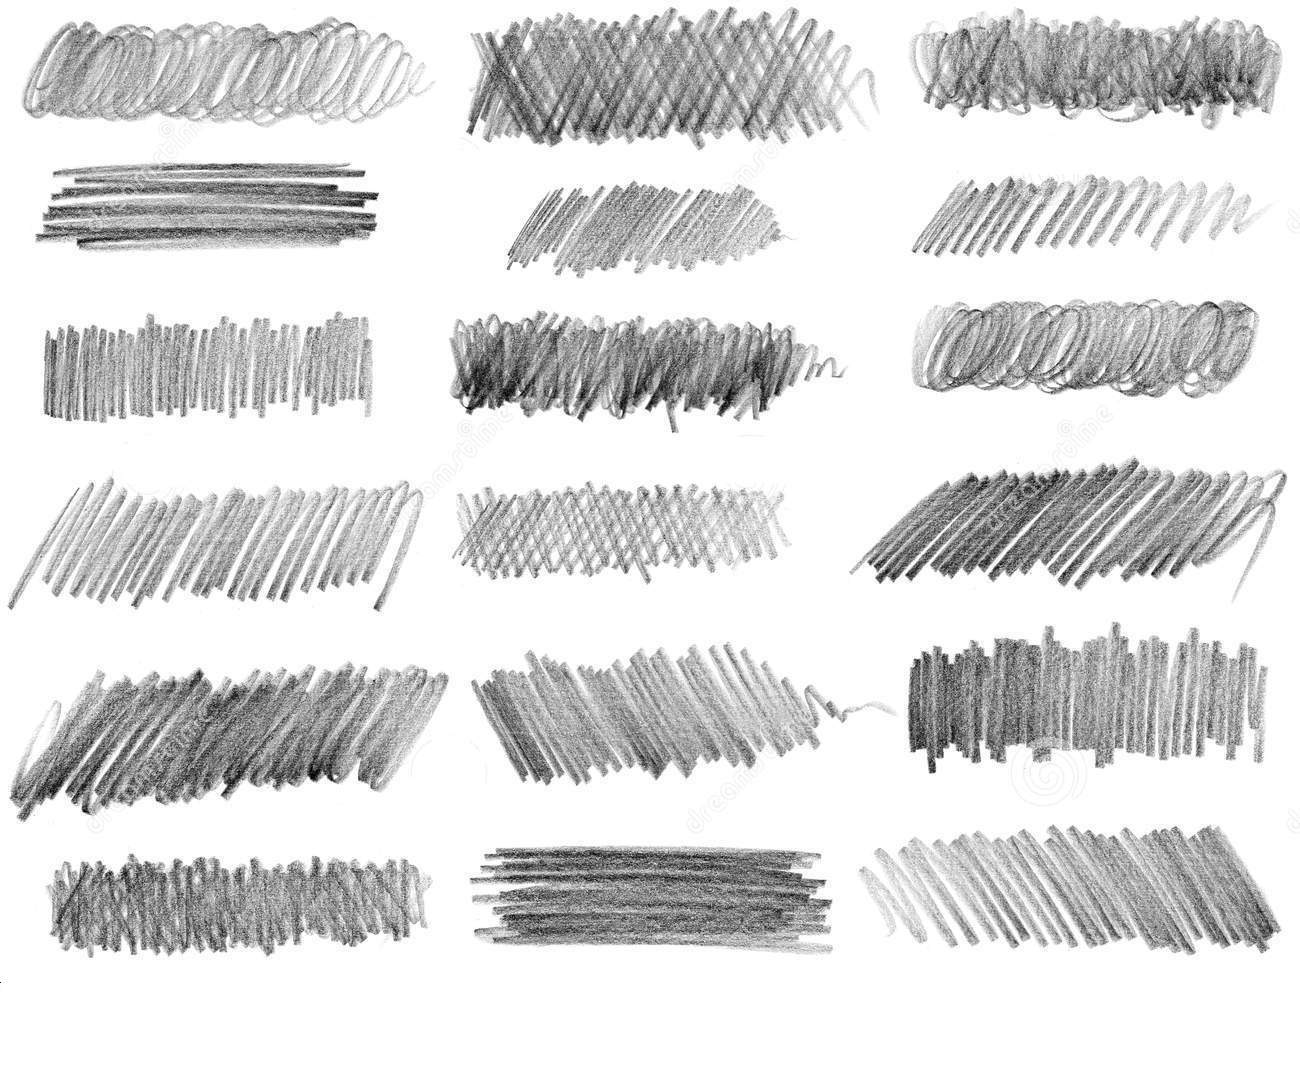
Yes, that is true. different strokes are used to define the surface of materials. Or different strokes forms are used to sketch a picture. It surely needs some examples to explain. Although these strokes needs good practice to develop skills.

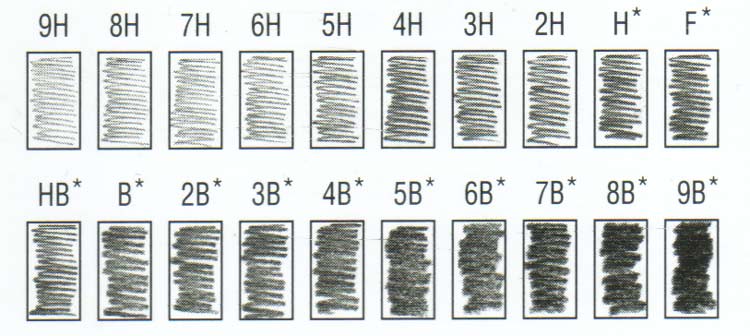
This picture shows different strokes which are used commonly in pencil sketch. These strokes are used to define different types of material surfaces.


This picture is a clear example of 3 types of commonly used strokes.
First line is done by rubbing the lead in a horizontal direction. Second line is a triple crosshatch practice. Third line shows the zigzag type strokes.
But these pictures clearly says that controlling the pressure of pencil is very important when you are creating different depths of shades.
This is an example how different depth of shades are created by controlling the pressure of pencils
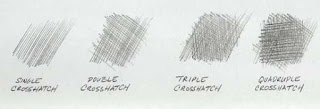
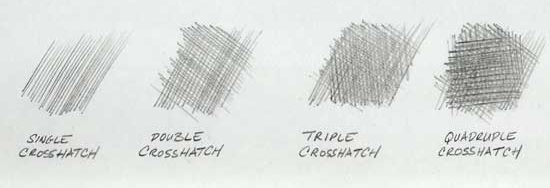
Now, talking about this picture. A very good examples of strokes. First is single crosshatch, second is double crosshatch, third is triple crosshatch and the fourth is quadruple crosshatch.
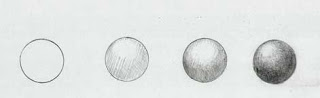
This is a nice example of converting a 2D object to 3D. How a circle is changed to a sphere by using pencil shades. During shading of an object you have to always remember the direction of light. Opposite side of the light the depth will be shaded.
EXAMPLES ON VARIOUS MATERIAL AND THEIR TEXTURES
In the next pictures I am going to show how the different shades and strokes are used to draw different materials or things.
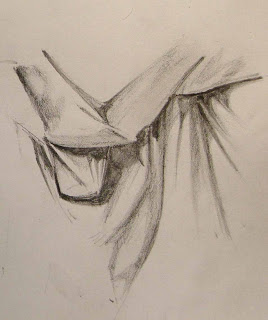
This picture clearly shows the shades, strokes of pencil for drawing a cloth. Look at the picture the shades are more and depths are given where shadow created and direction of light has also kept in mind. This concept should be clear that strokes are good to be molded as the material surfaces are molded.
When drawing cloth I have used the rubbing the lead strokes which creates a soft surfaces and textures of the cloth.
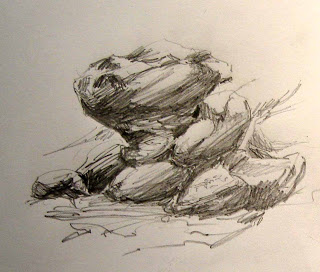
This is an example of drawing rock. Rock surfaces are rough. So I have used the different crosshatch method. As you see the orientation of strokes can be changed as the surface of the material molds in different direction.
The shadow and shades are done by keeping the orientation of light in mind.

This sketch gives an example of two types of material and their surface. First is the steel surface of the tap. I have used 0.5 for sharp edges, HB for light shades and 6B for depth.
This also depict how the shiny surface and sharp edge materials are sketched.
Second is water flow from tap. Look at the picture, water flow is shaded in various depths depending upon the transparency of this.
Again I am repeating the orientation of light source should always be kept in mind.
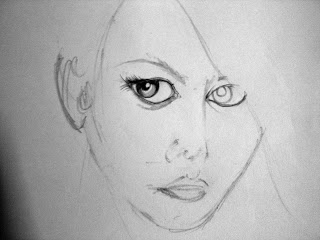
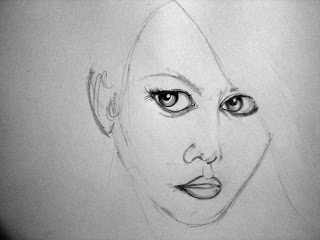
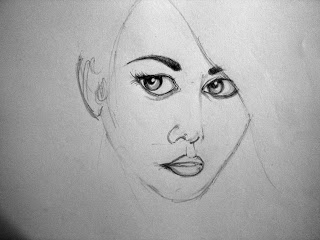
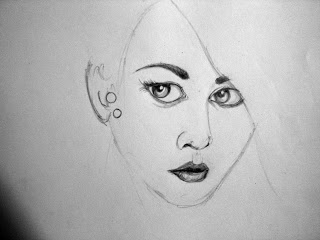
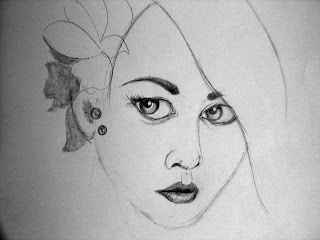
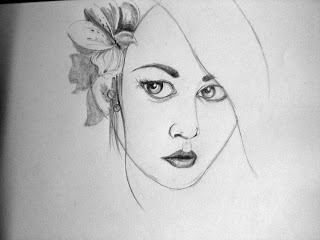
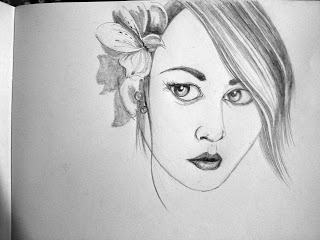
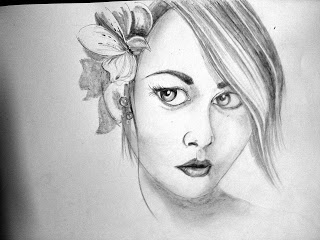
A BRIEF DISCUSSION ON PORTRAIT DRAWING
Drawing of Human face needs a very good skill. Human face has a proper ratio that you need to understand.
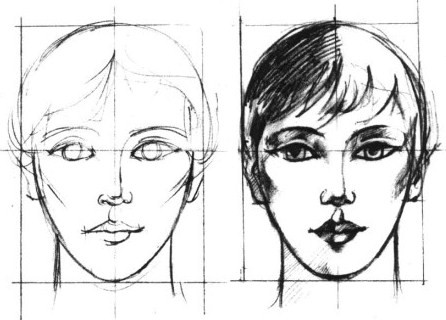

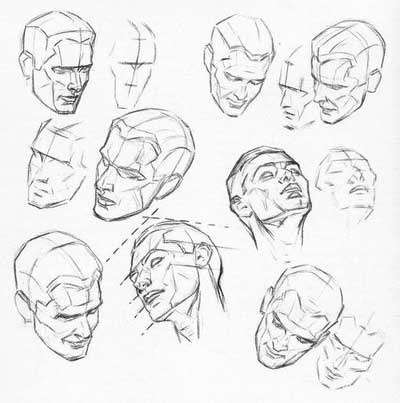
From these above pictures you will be able to understand the ratios of human face. How the proportion has to maintain when you are drawing a face. An artist has to practice a lot this proportion of face and figure for developing skills of human drawing.
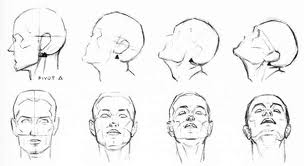

These two above pictures shows how a human face proportion changes from different angle. From every angle if it is front, left right, three quarter from top, bottom or any side proportion has to be maintained in a proper way.

